Showing posts with label Blichmann. Show all posts

Friday, July 10, 2015

Using The Blichmann BeerGun™

This month I share my very first experience using the Blichmann BeerGun™ to fill up some 12 ounce bottles. Previously in last month's update I documented how I connected the BeerGun™ to my existing kegging system. Since getting the beer gun connected I was able to brew a batch of my Orange Sunshine Belgian Witbier and put it on tap. This beer tasted so good and I enjoyed drinking it so much that I decided to bottle it up and take it with me on vacation. So with ten gallons of this delicious tasting beer force carbonated and ready to drink all I had to do was sanitize some bottles, hook the beer gun up and fill them up for the trip. 

I started to appreciate the benefits of filling bottles with carbonated beer right away. Having the same level of carbonation in your bottled beer as you have in your draft beer is definitely a huge plus. For one thing you no longer have to wait weeks for natural carbonation to occur then hope the beer had carbonated the way you planned. Bottling beer cold right from the same keg you've been pouring your drafts from eliminates any inconsistencies in carbonation levels. Another added bonus is not having to worry about the trub produced from priming sugar clouding up the beer. This becomes even more important when transporting or shipping bottles as they lay on their side getting jostled around.

Blichmann Beer Gun All Ready To Fill Some Bottles

Getting A Handle On The Handle

The first time I used the BeerGun™ to fill bottles it took me a little while to figure out the best way to maneuver it around the brew room. At first I wasn't used to working with something that trailed beer and Co2 lines behind it wherever it went. It didn't take long before I learned how to grip the gun comfortably enough to try and fill a few bottles. Soon after filling those first bottles it was easy to remember how the gun worked. Pressing the small button valve released Co2 from the tip of the beer gun into the bottle to purge it of oxygen. The flat handled valve when pulled back slowly released cold carbonated beer from the tip of the gun filling the bottles from the bottom up.
 
The steps required to fill the bottles were simple enough. Stick the beer gun barrel into the bottle until the tip touches the bottom of the bottle. Press the button valve for a few seconds to release Co2 inside the bottle to purge any oxygen from the bottle. Pull the flat handle valve to release cold beer into the bottle filling it up from the bottom to the top. With the bottle filled with beer remove the gun from the bottle and then place the tip of the gun even with the top of the bottle. Press the Co2 button valve and release it to replace any oxygen in the neck of the bottle with Co2. Lay a bottle cap on top of the bottle loosely to prevent anything from falling inside and to hold the Co2 in place until you're ready to cap the bottle.

Co2 Connections Go To Beer Gun And Keg

Get Organized And Keep It Cool

I found it much easier to move the gun and tubing around from place to place when both the gas and beer lines were neatly twist tied together. In this way the two lines acted like a single line with both bending and flexing together at the same time. Doing this kept the lines from twisting and kinking and putting a lot of unwanted strain on the gun itself. When filling six or more bottles at a time having as little resistance as possible on the gun makes the job of filling bottles much easier to do.    

When filling the bottles I recommend putting the bottles in a container deep enough to hold any beer that is sure to be spilled. I didn't use one and had to hose down the unpainted brewroom floor once I was done bottling, that's probably not something you will want to do inside your home though. Another thing I did was to setup my filling station so that the beer in the kegs would stay cold inside the refrigerator the entire time the bottles were being filled. The beer and gas lines sneak out through the small opening left between the refrigerator and the door's gasket. Filling chilled bottles with nice cold beer is the best way to reduce or eliminate foaming when bottling.

Cold Carbonated Beer In The Refrigerator And Beer Gun Ready To Go
I came up with a brilliant idea for chilling down bottles after they have been sanitized without having to put them inside a freezer. A large cooler holds about 30 twelve ounce bottles standing up with bottle caps loosely covering their tops. With the bottles covered so nothing falls inside them I carefully laid mats of frozen ice packs on top of the bottle caps and closed the cooler lid. By the time I finished sanitizing the beer gun and connecting the Co2 and beer lines the bottles had all been chilled down nice and cold and were ready for filling. I found that filling the cold bottles with the inside of the bottles still slightly wet with sanitizer helped to reduce foaming even more. 

Sanitized Bottles With Loose Bottle Caps On Top
The cold ice packs placed on top of the bottle caps does a great job of cooling down the bottles in preparation for filling. When filling them I was surprised to see that many of the bottle caps had sealed tightly to the tops of the bottles creating a slight vacuum that could be felt when lifting the caps off. It's always important to maintain good sanitization practices during the filling process especially if you plan on storing your bottled beer for several months before drinking it.

Reusable Ice Packs Are A Good Way To Chill Bottles

Settle In And Get Comfortable

I like to fill my bottles while I'm sitting in a chair and the bottles, caps and capper are on the floor next to me. This way I can reach into the cooler and get six or so bottles ready to fill and then cap them without having to get up. Once you get yourself organized the plan should be to rip through the filling process as quickly as possible. Even when using a beer gun the process of bottling beer is not exactly in my top five list of fun things to do.

Getting Comfortably Setup And Organized Saves Time
For my setup I turned the Co2 gauge down to read between 3-4 pounds of pressure. I found that setting worked the best to push the beer into the bottles without foaming while providing enough force to purge the bottles of air before and after filling them. I first inserted the barrel of the gun down to the bottom of the bottle and pressed the Co2 button for a few seconds to replace any room air in the bottle with Co2. Doing this will help to preserve the beer and prevent it from oxidizing while stored in the bottle.

Purge Room Air From Bottle With Co2 Before Adding Beer

Filling The Bottles With Beer

With everything needed for bottling laid out and within easy reach it didn't take long for the process to develop a nice rhythm. Remove the cap then purge the air, fill with beer then purge the air, replace the cap then do the next, then cap, then cap, then cap... In between all the filling and purging eventually you'll need to put the beer gun down for a while to use both hands for something. Having a bottle or container that's filled with StarSan and sturdy enough to hold the gun without tipping over comes in handy. I also kept a small dump container nearby to use when emptying beer from the gun or bottles if needed.

In Between Fills Put Your Gun In A Holster That Won't Tip Over
The barrel diameter of the beer gun is designed so it will leave just the right amount of headspace above the beer once the bottle has been filled and the gun removed. By placing the tip of the barrel just above the top of the bottle and giving the Co2 valve a short squeeze any air in the headspace will be replaced with Co2. This extra step is recommended especially if you plan to store your bottled beer for an extended period of time. After only a few tries the task of purging room air from the headspace in the bottles became intuitive and very easy to do.

Purge Room Air From Headspace With Co2 Before Capping
Simple Care And Maintenance

Soon after a bottle filling session it's important to clean out the beer line and gun in order to keep it working like new. Cleaning the gun and line is no different than cleaning out your beer tap and serving lines. A corny keg connected to a Co2 gauge and filled with a half gallon of StarSan works perfectly to flush any beer out of the gun. After pushing about a quart of StarSan solution through the beer line and gun replace the StarSan in the keg with clean warm water and repeat the process.  

One brewer I know reported having an issue with the little rubber stopper on the end of the beer gun. He claimed the rubber stopper on his gun became soft and sticky after an extended time sitting in StarSan. For that one reason alone I prefer to give the gun and lines a good rinse with clean warm water after running StarSan through them. Another brewer claimed the rubber stopper on his gun came off and landed inside the bottle he was filling. Once that happened the only way to stop the beer from flowing was to disconnect the beer line from the keg.

After filling about 60 bottles I haven't had either of those things happen to me. Fortunately replacement parts for the Blichmann BeerGun™ are readily available in case you need to order additional parts at any time. The replacement tip can currently be ordered from the Adventures In Homebrewing website for less than $3.00 USD. You can also order Blichmann BeerGun™ replacement parts from any of their many authorized dealers.


It's All Good

It's been nearly a week now since I returned home from vacation where the real test of the beer I bottled took place. Out of the 30 bottles I took with me only three of them found their way back home. The rest of the beers were shared with some of my beer loving family members who really liked it a lot. The Orange Sunshine Belgian Witbier is a nice refreshing session beer that's just perfect on hot summer days and warm summer nights. More than that each beer was evenly carbonated and very clean tasting right out of the cooler even after a 110 mile drive down the Garden State Parkway.

Looking back I have nothing but fond memories of a vacation shared with family, filled with good food and plenty of great tasting beer. For me nothing could have been more rewarding than to have tested out a new bottling method and knowing it passed with flying colors. Going by the results of a long holiday weekend get away I have every reason to think bottling beer for long term storage will prove to be just as successful as this short run. In fact I have ten gallons of my Hiphopapocalypse IPA that's nearly ready for packaging and plan on using my Blichmann BeerGun™ again soon.

Sunday, June 7, 2015

Setting Up The Blichmann BeerGun™

Over the years I had read plenty of mixed reviews about the Blichmann BeerGun™ before actually pulling the trigger and getting one for myself. It seemed that the two most common BeerGun™ complaints posted by brewers had to do with its overall cost and how under some conditions beer bottled using the BeerGun™ could be under carbonated. I had been interested in finding an alternative to bottle carbonating my beer using priming sugar for years, but I had put off using a BeerGun™ for a very long time. That is until I toured the Triumph Brewery in Princeton NJ and saw that they had been using a Blichmann BeerGun™ to fill up their new line of 750ml bottles! I figured if the BeerGun™ was good enough for a commercial brewery to use to package their beer then it had to be good enough for me.

Blichman Beer Gun Ready To Go
The BeerGun™ and it's accessory kit, which I highly recommend you order when ordering the BeerGun™, a new two way wye fitting and a shut off valve currently retail for under $150.00 USD. For the installation in my brew room I decided to add a wye fitting to my existing Co2 gauge in order to add a second shutoff valve and gas line to the gauge. The second line would then be used to push Co2 to the gun for purging the bottles and when the gun wasn't in use the second line could be used to carbonate or serve a second keg of beer that was in the refrigerator. For me that was a win/win since I often carbonated two kegs at the same time by frequently switching the Co2 line between the gas in post of both kegs until they were both carbonated. The addition of the second gas line would allow me to truly set and forget once and for all when force carbonating two kegs at the same time.

The Blichmann Beer Gun Package

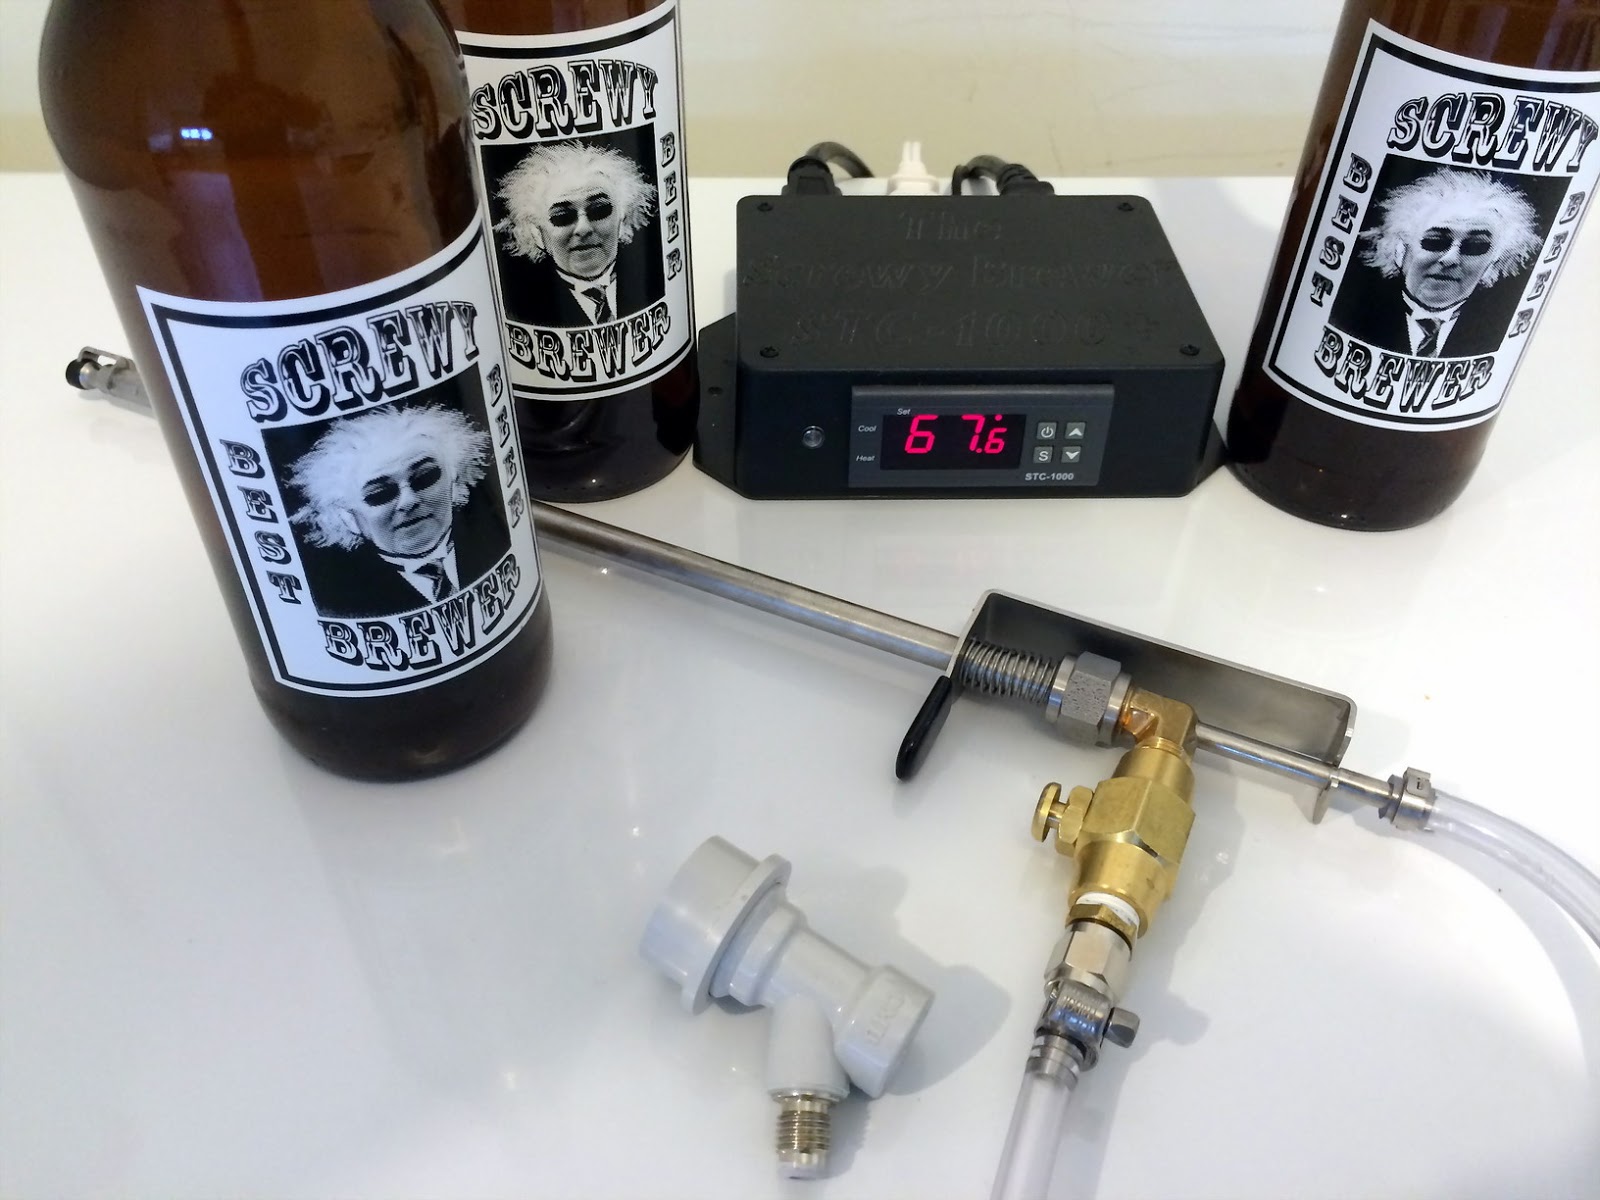
The Blichmann BeerGun™ comes with the gun, a ten foot length of 3/16 inch ID vinyl beer line and a beer line brush for cleaning the rigid metal tubing of the gun. The beer gun I received was already assembled when I opened the box. All I had to do was clip the flat metal handle of the beer valve onto the rigid metal inner beer tube on the gun and clamp (included in the accessory kit) the vinyl beer line to the end of the same tube. To make the remaining connections needed in order to use the Beer Gun I used the additional parts that came with the Beer Gun Accessory Kit.

Blichmann Beer Gun Accessory Kit

The Blichmann BeerGun™ Accessory Kit comes with a five foot length of 1/4 inch ID vinyl gas line tubing (I wish it were 10 foot long). The gas line tubing had two 1/4 inch stainless steel swivel connectors clamped to the ends. A threaded brass flare connection is included too. The brass threads get wrapped with Teflon tape and then carefully threaded into the Co2 valve on the Beer Gun and tightened. Once the brass flare connector is installed on the gun the gas line tubing is used to connect the Beer Gun to a threaded flare connection on a ball lock gas line connector (sold separately).

Swivel Connectors To Beer Gun And Gas Line Connector

The use of swivel connectors in the line allows the beer and gas line configurations to be changed a lot easier than I had been used to. With the twist of a wrench the connectors can be switched over from the ball lock gas connector to the gas valve on the Beer Gun without having to use a screwdriver on any clamps or a knife to trim the vinyl tubing. With the Beer Gun assembled and all of the required connections made it was time to add another gas line to my gauge to be used by the gun to purge bottles with Co2 before filling them.

Beer Gun, Corny Keg And The Three Connections Needed

Making The Connections to the gun is a little different than when connecting a keg to a beer tap using a single gas in and a beer out line. I plan on leaving my kegs of carbonated beer inside the refrigerator to keep cold the entire time I bottle my beer. I chose for my installation to run a new 10 foot length of gas line from the Co2 gauge through the refrigerator wall and to put a swivel connector on the end. The new gas line supplies the Co2 to the gun that it then uses to purge air out of the bottles before they're filled with beer.  

Co2 And Beer Lines Run From Inside The Refrigerator
The existing gas line supplies the Co2 to the keg that's used to push beer out to the gun. The new beer line is connected to gun and the beer out post of the keg inside the refrigerator. With the keg of beer kept cold inside the refrigerator and the new gas and beer lines connected and tested the Beer Gun is ready to sanitize and use for filling bottles. When using the gun I tie the beer and gas lines together using twist ties and then run the lines outside of the refrigerator through the small gap created when the door is left slightly open.  

Adding The Second Gas Line provided my first installation surprise when I tried to remove the existing shut off valve from the Co2 gauge. I quickly found out that I would need a bench vise to hold the gauge body in place while I unscrewed the parts from it. Luckily I found an old bench vise on a shelf in the brew room and after a bit of wrench muscling and gently applying Teflon tape to some threads I was able to reconfigure the Co2 gauge using the new wye fitting and shutoff valves.

Co2 Gauge Modification For Second Gas Line

After removing the shut off valve from the gauge body I wrapped Teflon tape around it's threads and the threads of the second shut off valve and then put the wye fitting snugly into the vise to hold it steady. As I tightened both shut off valves into the wye fitting I made sure they were both squarely aligned with each other, this was done mainly for aesthetics to make the installation look as neat as possible.

A Bench Vise Makes Fitting Changes Much Easier
I was fortunate enough to find a spare gas line shut off valve beer parts cabinet and I used that to screw into the wye for the second gas line. With all of the parts on hand I carefully removed the existing gas line shut off valve from the Co2 gauge body using an adjustable wrench. A bench vise was needed to hold the gauge body from turning as I applied a good deal of torque needed to unscrew the shut off valve from the gauge body.

Threading The Two Shut Off Valves Into The Wye Fitting

With the shut off valve removed I wrapped the male end of the wye fitting with Teflon tape and carefully threaded it into the gauge body. I removed the gauge from the vise and tightened the wye fitting in its place and then wrapped the threaded ends of the shut off valves with Teflon tape. Next I carefully threaded both shut off valves into the wye fitting and tightened them snugly. Putting the gauge back into the vise I used the adjustable wrench to tighten the wye fitting snugly into to gauge body.

Co2 Gauge With Wye Fitting And Shut Off Valves

Once all of the fittings were tightened onto the gauge I connected the gauge to the Co2 tank and then marked out the side of the refrigerator where the hole for the second gas line would go. I found that the 5 foot length of 1/4 inch ID tubing that came with the Beer Gun accessory kit was too short for my installation and I bought another 10 foot long length to use instead. Thanks to the swivel connectors on the ends of the Beer Gun lines I can now unscrew the keg end gas connector from the new gas line and in its place screw on the gun's gas connector. Now that the beer line and the gas line are both 10 feet long I have plenty of slack in the lines to reach my makeshift filling station where I can easily fill my bottles.

Second Gas Line Modification Completed

As luck would have it my Blichmann BeerGun™ installation coincided with my nearly running out of kegged beer. But I did manage to sanitize and refrigerate a few 12 ounce bottles and test out the new installation by filling them with cold beer. It takes a little time to get used to maneuvering the gun around the brew room when filling bottles but I did find it easy enough to use, clean and sanitize it though. The beers I had filled I later opened after 3 days and they were perfectly carbonated, I should point out that the beer was force carbonated to 15 psi at the time of filling the bottles. Installing and using the Beer Gun was a fun project to install and use and I look forward to having the ability now to bottle my beer without ever having to use priming sugar again.

Blichmann BeerGun™ Manual

The manual is very well written with plenty of pictures that show exactly how the gun and Co2 gauge should be configured to work together. When I received my gun I found that the main tube and connectors were already assembled and I could skip over the pages that explained how that part of the assembly should be done. It's good to have those steps included in the manual though in case you ever need to disassemble the gun for cleaning or repair. I'm in the habit of cleaning up my gun as soon as I'm done using it. I run a mild solution of OxiClean FREE and warm water through the beer line to the gun followed by a warm water only rinse before storing it away. Doing this will prevent any buildup of of dried beer inside the dispensing tube and keep the gun working like new.