The February 2013 qBrew ingredient database is now available for download and it comes with 6 great recipes to get you started. This month's update includes a greatly expanded selection of yeast, extract and grains to make brewing up your next recipe easier than ever before.
Click here to get the February 2013 qBrew update

Showing posts with label Mr. Beer. Show all posts
Showing posts with label Mr. Beer. Show all posts
Saturday, February 23, 2013


Sunday, November 14, 2010
qBrew - Homebrewers Recipe Calculator
qBrew is the beer recipe calculator of choice for homebrewers looking for a free software program that's intuitive and easy to use. qBrew comes installed with it's own beer style, grain and ingredients database and is ready to use right away with minimal setup. qBrew will automatically calculate the gravity, color and bitterness of your recipe as you add in grains, extracts, adjuncts and hops, it works for both ales and lagers as well.
** Special considerations: The qBrew application was written by David Johnson, last updated May 25th, 2008 and was originally available as an open source download from his now defunct qBrew Site at www.usermode.org/code.html. While the original .qbrewdata database file did not contain ingredients for Mr. Beer products users of qBrew have added them and other hop varieties, yeast types and fermentables.
Many brewers, myself included, have devoted their time to researching and adding updates to the original qBrew database so that we can share it with other brewers. Thank you to the countless other brewers out there who have shared their understanding of the inner workings of the qBrew formulas and how they are used to calculate your recipe's characteristics.
** Special considerations: The qBrew application was written by David Johnson, last updated May 25th, 2008 and was originally available as an open source download from his now defunct qBrew Site at www.usermode.org/code.html. While the original .qbrewdata database file did not contain ingredients for Mr. Beer products users of qBrew have added them and other hop varieties, yeast types and fermentables.
Many brewers, myself included, have devoted their time to researching and adding updates to the original qBrew database so that we can share it with other brewers. Thank you to the countless other brewers out there who have shared their understanding of the inner workings of the qBrew formulas and how they are used to calculate your recipe's characteristics.
qBrew lets you to override any of the numbers associated with a given recipe ingredient, in case your current supplier has a different alpha acid percentage for the hops your using or for differences in grain or brewing efficiency. The default recipe numbers are loaded into qBrew from the database and can be changed in your recipe to match your actual numbers without changing the database default numbers.
The upper section of qBrew is where you enter the recipe title and brewer name and select the style of your recipe. The characteristics of the style are then displayed showing the minimum and maximum numbers for the Original gravity, Bitterness and Color. As you enter your ingredients into the lower section of qBrew the characteristics of your recipe are calculated and displayed in bold letting you know how the ingredients can influence your expected results.
The upper section of qBrew is where you enter the recipe title and brewer name and select the style of your recipe. The characteristics of the style are then displayed showing the minimum and maximum numbers for the Original gravity, Bitterness and Color. As you enter your ingredients into the lower section of qBrew the characteristics of your recipe are calculated and displayed in bold letting you know how the ingredients can influence your expected results.

qBrew's Grain/Extract/Adjunct Entry Screen
Download the qBrew recipe calculator program installation
Click here to download qBrew 4.1 for Mac OSX
Download the latest qBrew database (Includes Mr. Beer/Coopers and BrewDemon refills)
The November 2014 qBrew database has been greatly expanded to include new beer styles, an expanded selection of yeast strains and a more detailed reference of grains, including malt flavor characteristics to help you craft your next recipes. Keep your qBrew recipe calculations, ingredient lists and much more up to date with this easy to install database update.
** Includes the new BrewMax (LME/DME) SoftPacks and Deluxe Refills like Classic American Light Deluxe, Porter Deluxe and many many more existing new recipes!
** Includes the new BrewDemon Basic, Plus and Signature HME refills like
American Prophecy Ale, Hellfire Deep Red Ale and Shedu Oatmeal Stout!
** For the new Mr. Beer/Coopers extracts enter them as 1.87 pounds for Grains and 1.00 ounce at five minutes for Hops, see sample recipe included in this update
Ingredient Database Installation For Windows 10 or 11 Users:
Click here to download Screwy's latest qBrew database (.qbrewdata)
Ingredient Database Installation For Windows 10 or 11 Users:
Locate the .qbrewdata file in the C:\Program Files\qBrew\ folder and rename it to .qbrewdata-orig. Unzip the .qbrewdata file from the screwy-qbrewdata.zip file you downloaded and copy it to the C:\Program Files\qBrew\ folder, qBrew will load this latest database file when it runs.
If qBrew was installed to another folder location Like D:\qBrew\ then rename the .qbrewdata file to .qbrewdata-orig. Unzip the .qbrewdata file from the screwy-qbrewdata.zip file you downloaded and copy it to the D:\qBrew\ folder and qBrew will load this latest database file when it runs.
Ingredient Database Installation For MAC Users:
Click here to download Screwy's latest qBrew database (qbrewdata-MAC)
Extract the compressed qbrewdata.MAC file from the screwy-qbrewdata-MAC.zip file you downloaded and rename it to qbrewdata (remove the .MAC extension).
Open a new Finder window, go to your Applications folder and Ctrl+click the qBrew application. Select 'Show Package Contents' then navigate to Contents->Resources and rename the qbrewdata file in this folder to qbrewdata.orig.
From the original Finder window, drag the new qbrewdata file into the Resources folder in the new window. Restart and qBrew will load this latest database file when it runs.
You can also copy and paste the file into the new directory using Command-C and Command-V respectively instead of having to jump between windows.
Download the latest qBrew database (Includes Mr. Beer/Coopers and BrewDemon refills)
Updated on September 4, 2025 ** Includes 10 Favorite Recipes Inside**
The November 2014 qBrew database has been greatly expanded to include new beer styles, an expanded selection of yeast strains and a more detailed reference of grains, including malt flavor characteristics to help you craft your next recipes. Keep your qBrew recipe calculations, ingredient lists and much more up to date with this easy to install database update.
** Includes the new BrewMax (LME/DME) SoftPacks and Deluxe Refills like Classic American Light Deluxe, Porter Deluxe and many many more existing new recipes!
** Includes the new BrewDemon Basic, Plus and Signature HME refills like
American Prophecy Ale, Hellfire Deep Red Ale and Shedu Oatmeal Stout!
** For the new Mr. Beer/Coopers extracts enter them as 1.87 pounds for Grains and 1.00 ounce at five minutes for Hops, see sample recipe included in this update
Ingredient Database Installation For Windows 10 or 11 Users:
Click here to download Screwy's latest qBrew database (.qbrewdata)
Ingredient Database Installation For Windows 10 or 11 Users:
Locate the .qbrewdata file in the C:\Program Files\qBrew\ folder and rename it to .qbrewdata-orig. Unzip the .qbrewdata file from the screwy-qbrewdata.zip file you downloaded and copy it to the C:\Program Files\qBrew\ folder, qBrew will load this latest database file when it runs.
If qBrew was installed to another folder location Like D:\qBrew\ then rename the .qbrewdata file to .qbrewdata-orig. Unzip the .qbrewdata file from the screwy-qbrewdata.zip file you downloaded and copy it to the D:\qBrew\ folder and qBrew will load this latest database file when it runs.
Ingredient Database Installation For MAC Users:
Click here to download Screwy's latest qBrew database (qbrewdata-MAC)
Extract the compressed qbrewdata.MAC file from the screwy-qbrewdata-MAC.zip file you downloaded and rename it to qbrewdata (remove the .MAC extension).
Open a new Finder window, go to your Applications folder and Ctrl+click the qBrew application. Select 'Show Package Contents' then navigate to Contents->Resources and rename the qbrewdata file in this folder to qbrewdata.orig.
From the original Finder window, drag the new qbrewdata file into the Resources folder in the new window. Restart and qBrew will load this latest database file when it runs.
You can also copy and paste the file into the new directory using Command-C and Command-V respectively instead of having to jump between windows.
Setup qBrew Defaults:
Run qBrew and select Configure from the Options menu then the Recipe tab.

Select Pellet for Hop type and enter 2.13 gallons for the Mr. Beer keg size
Verify that the default settings are setup on the Calculations tab.

.75 Mash Efficiency Default Calculations Setting
Example Mr. Beer based recipe:

Mr. Beer Extracts Weigh 1.21 Pounds
Grains: Enter fermentable grains, extracts, sugars and fruit.
For creating recipes you first enter a new line on the grains tab by right clicking in the lower section and selecting 'Add Ingredient'. Left click on the default grain inserted into the lower grid and select the type of extract you are using in your recipe. You then enter the weight of the extract by left clicking in the 'Weight' column and adjusting the default value to match your recipe, for instance Muntons extract cans weigh 3.3 pounds while Mr. Beer extract cans weigh 1.21 pounds. Both unhopped malt extracts (UME) and hopped malt extracts (HME) are available for entry on the grains tab.

For Hopped Malt Extracts (HME) Use A 5 Minute Boil Time
Hops: Enter the variety of hop, weight, alpha acid, boil time and type.
Insert a new line and change the default hop variety to add to your recipe by selecting it from the drop down list and adjusting the weight, alpha acid, boil time and type to match your recipe. The hops tab saves your hop variety and their current percentage of alpha acids as well as the boil times used for this recipe. Screwy's .qbrewdata database file contains the full list of Mr. Beer HME values.
Example: If you were going to add more bitterness to this extract recipe you might add a new line for 1/2 ounce of Cascade hops boiled for 30 minutes. For flavor add another new line for 1/4 ounce of Cascade hops boiled for 12 minutes and a new line for 1/4 ounce of Cascade hops boiled for 5 minutes for aroma.
Special Note When Entering Hop Additions: If you want to add up all the IBUs for your hop additions enter all your hops before adding in your grains. As you add in your grain additions qBrew's built in formula will begin subtracting the malt's sweetness from the hop's bitterness in order to indicate the balance of the recipe. The formula qBrew uses to calculate this balance is the same one used by my Bitterness Balance Calculator to display the recipe's overall balance between hopped bitterness and malt sweetness in a hopped beer style.
The formula takes into consideration the beer's original gravity, actual attenuation and bittering level but does not take into account phenol, ester or other complexities. The beer drinker should use the desired IBUs as a reference point and decide for themselves what they consider to be balanced.

Select The Type Of Yeast And Quantity
Miscellaneous: Enter the type of yeast used for fermentation
Insert a new line and change the default yeast value to add to your recipe by selecting it from the drop down list and adjusting the weight if necessary.

Enter Recipe And Batch Notes For Future Reference
Notes: Type in any recipe and batch related notes for the recipe, this will come in handy in the future when you try to reproduce the great beer you just drank. All brewers should take notes and keep records of the beer recipes they brew, including the brewing process that was used. If you're like me you will want to tune and tweak your favorite recipes and brewing processes trying to improve on them each time you brew.

Calculated Characteristics For Your Recipe
Characteristics: We setup qBrew to use a realistic mash efficiency of .75 as this is an acceptable average efficiency for most home brewers. Any differences in the percentage of alcohol by volume (ABV) calculations performed by qBrew and those stated by any extract supplier are related to differences in efficiencies used when determining the extract's rated ABV.
Good brewers rely on consistency when calculating their recipes and during their brewing process. qBrew lets you to create recipes based on beer's key ingredients and then calculates the expected characteristics of the beer using formulas widely accepted by homebrewers. As you brew your recipes some fermentable volumes or boil times may need to be tweaked as needed to match your brewing process.
Hop Calculation Tip: When entering all your hop additions on the 'Hops' tab before entering any ingredients on the 'Grains' tab qBrew will calculate the IBU for those hops. Record this number in the 'Notes' tab for later reference as this number will change when ingredients are entered in the 'Grains' tab.

Hops, Grains And Water
Click for more...Hops In Your Beer
Friday, August 27, 2010
30 Recipes And Going Strong
I've brewed 30 different Mr. Beer recipes in 2010 ranging from simple to complicated and at this point I doubt I'll ever 'advance' to another type of brewing. Every recipe has produced great tasting beer and I've never had an issue with infection, oxidation or dead yeast just following the standard Mr. Beer directions. I've never moved the batches to a secondary fermenter or cold crashed them before bottling since the beers always come out clear and have great foam.
Mr. Beer brewing is perfect for my lifestyle and wallet, I can brew really good tasting beer with a minimum of fuss and bother. On brew day I typically brew 6 batches (12 gallons) of beer in my fermenters in about 7 hours start to finish including cleanup.
Mr. Beer brewing is perfect for my lifestyle and wallet, I can brew really good tasting beer with a minimum of fuss and bother. On brew day I typically brew 6 batches (12 gallons) of beer in my fermenters in about 7 hours start to finish including cleanup.

Six 2 Gallon Fermenters With Six Different Recipes
The 2 .13 gallon batch sizes are perfect for experimenting with new recipe additions and the kegs do not take up a lot of room. Instead of 'moving on' to the other types of brewing I just keep tuning and tweaking my Mr. Beer and recipes, and recipes created by other brewers, using the smaller fermenters.
I'm anxious to try adding some Crystal steeping grains to my next recipes, still using the Mr. Beer fermenters, and using some new dry or liquid yeast strains to add a bit more fullness to my next beer recipes. While extracts set the stage for the style of beer you want to brew the addition of steeping grains, hop varieties and types of yeast all work together to give each recipe a unique character.
Novacaine Recipe brewed June 10, 2010:
1 Can West Coast Pale Ale HME
1 Can St. Patrick's Irish Stout HME
1 Can Golden Wheat UME
2 Cans Pale Export UME
2 Packets Dry Brewing Yeast
2 Packets Sterling Pellet Hops
2 Packets Northern Brewer Pellet Hops
1 Pouch Ale Liquid Yeast
2 Muslin Hop Sacks
Saturday, August 14, 2010
Bottle Day - 6 Batches In Under 7 Hours
This weekend I was able to bottle up 6 separate Mr. Beer recipes in just under 7 hours, including kitchen cleanup! This makes 27 two gallon batches bottled to date, starting in February 2010. I picked all lighter colored pale ales and a wheat beer recipe to brew last month since it's been so hot here on the east coast. This time I also used my new carbonation calculator to determine the correct amounts of priming sugar to use in each different style of beer. I no longer followed the default priming sugar amount recommended by Mr. Beer's instructions.
I bottled up 2 gallons each of the following recipes:
Father's Day Cream Ale, Classic American Blonde Ale w/Pale Export, West Coast Pale Ale w/Pale Export, High Country Canadian Draft w/Pale Export, Cowboy Golden Lager w/Pale Export and last but not least one of my favorites Whispering Wheat Weizenbier w/Golden Wheat.
Office desktop space doubles as a 6 keg fermenting station
I bottle my beer in 1 litre PET bottles that I first sanitized using One-Step™ sanitizing cleanser that came with my Mr. Beer premium home brewing kit and stirred in a packet of sanitizer into a pot holding 2 gallons of warm water. Then using a small funnel and a plastic cup I filled each of the 54 PET bottles about halfway with the sanitizing solution, give them all a few really good shakes and lat them soak lying down for at least 10 minutes.
While the bottles were soaking I poured a small sample of beer for tasting and visual inspection. Ideally after fermenting for 21 days at a constant 70F the beer at this point will taste like flat beer and not too sweet. This is a sign that most of the sugars in the green beer have been turned into alcohol and CO2 already and the beer is ready to bottle.

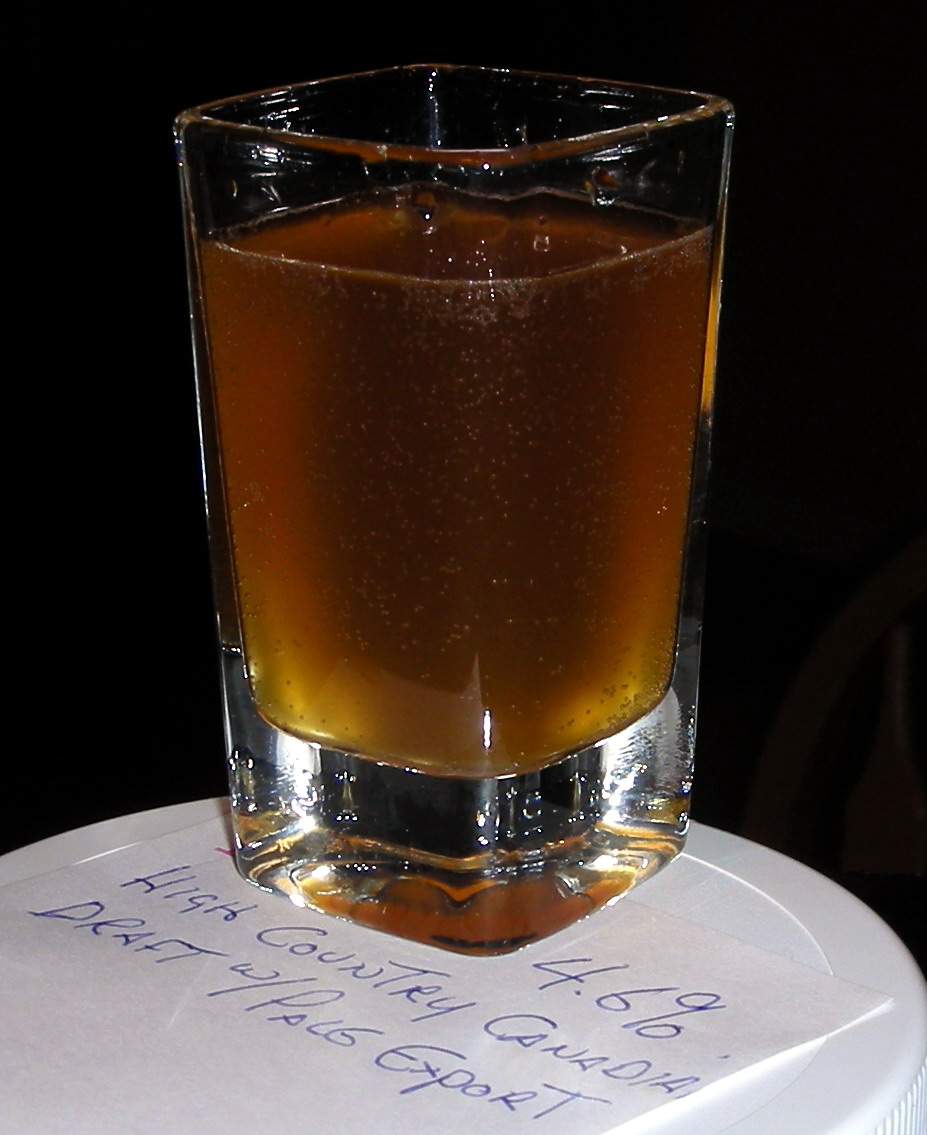
High Country Canadian Draft with Pale Export sample taken just prior to bottling.
The sample above shows the clarity of the beer and proof of the residual CO2 present in the beer as indicated by the small bubbles on the sides of the sample glass. I targeted the finished beer's CO2 volume to be 2.5 volumes modeled after the CO2 volumes of an 'American Style Pale Ale' which is between 2.26 to 2.78 volumes.
At 70 F the residual CO2 volume of the fermented beer calculated out to .83 volumes.To increase the volume to target of 2.5 volumes of CO2 I added 1.5 additional teaspoons of pure cane sugar to each 1 litre PET bottle as shown by the calculator below.

At 70 F the residual CO2 volume of the fermented beer calculated out to .83 volumes.To increase the volume to target of 2.5 volumes of CO2 I added 1.5 additional teaspoons of pure cane sugar to each 1 litre PET bottle as shown by the calculator below.

After pouring 1.5 teaspoons of cane sugar into each bottle and filling them with fermented beer, I turn each bottle 'end over end' several times to mix the sugar and beer together. This is done to make sure the sugar is evenly distributed throughout the beer before screwing on the bottle caps and beginning the carbonation process.

Over the next 21 days the yeast will convert the priming sugar to CO2 and alcohol to produce just the right amount of carbonation for the style of beer bottled. I carbonate my beer at a constant 70F and usually give them a squeeze once a day to see how the carbonation is progressing. Not much happens carbonation wise for the first 1 to 3 days but the bottles will become slightly harder to squeeze each day.

Pet bottle after mixing the priming sugar into the fermented beer.
Over the next 21 days the yeast will convert the priming sugar to CO2 and alcohol to produce just the right amount of carbonation for the style of beer bottled. I carbonate my beer at a constant 70F and usually give them a squeeze once a day to see how the carbonation is progressing. Not much happens carbonation wise for the first 1 to 3 days but the bottles will become slightly harder to squeeze each day.
Monday, July 26, 2010
Fermentation Temperature
I've read quite a few posts regarding fermentation temperatures and how brewers around the country measure and attempt to control them, in hopes of getting the best results from the yeast strains they use. After doing some research on this topic I found the following bit of information on the Brew Your Own website that I wanted to share with you.
"However, in a small fermenter such as a 5-gallon (19-L) carboy the difference between the air temperature and the beer temperature is usually within about 5 ºF (3 °C). So if you have a yeast strain that produces the best beer when fermentation is held at 70 ºF (21 °C) the surrounding air temperature should be around 65 ºF (18 °C). You can periodically monitor this by inserting a thermometer into the fermenting beer."
The reason I found this post so interesting is that it talks about the exact same temperature control setup I have been using at home to ferment and carbonate my beers, all 27 of them. In my upstairs office/brewery where I have been fermenting and carbonating my Mr. Beer recipes I run a small 110 volt window air conditioner set to 70F.
Subscribe to:
Posts (Atom)